
Reconciling Credit Card Statement
To reconcile the credit card entries to the statement, follow the reconciliation process. This reconciliation view will be mostly the same as the normal checkbook reconcilitation process.
On the ACTIVITIES menu, the RECONCILIATION PROCESS icon is divided into top and bottom. If you click the top of the icon, the normal Check Book Reconciliation will open. If you click the bottom of the icon, a choice of the normal reconciliation process and the new credit card reconciliation will be displayed.
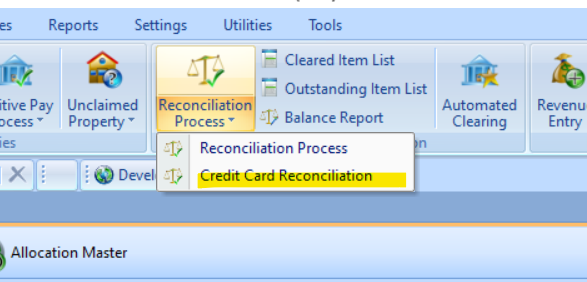
 NAVIGATION: ACTIVITIES Menu > Reconciliation Process > Credit Card Reconciliation
- Select the Checkbook
- Enter that Credit Card Statement balance due
- Enter the Credit Card Statement Date
- Note: you may reconcile against online activity as often as needed, it may be done monthly, weekly, or daily.
- Click Start Reconciling
- The activity - up to that date, that was not previously cleared, will be shown.
- The top section will contain your payments to the credit card provider and other reductions to the balance due.
- The bottom section is your charged purchases and other increases to amount due.
- For each item on the Credit card statement, check it in the system.
- Any item on the statement that is not in the Reconciliation will need researched and entered.
- Some items in the system may not be on the statement and will not be checked. This may be normal and correct for charges that have not been processed to your card. However, if an old item continues to remain uncleared, please research if the entry is in error.
- You may come back to the reconciliation and click START RECONCILING as many times as needed until in balance.
- When reconciliation is in balance, the DIFFERENCE field will display $0.00. The Statement is not balanced and should not be completed until the DIFFERENCE field displays $0.00.
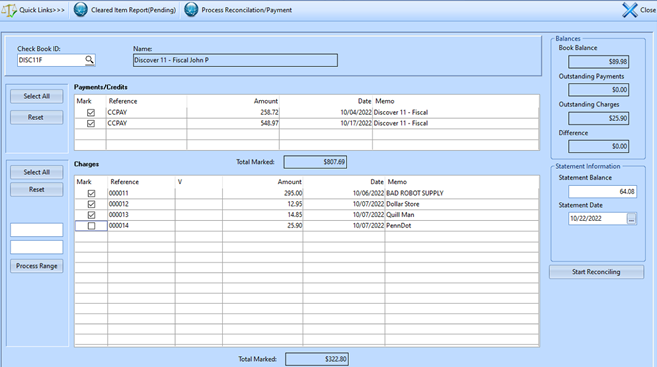
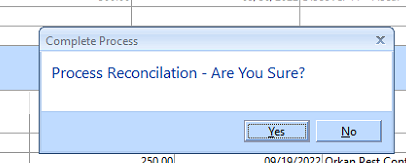
- When in balance press “Process Reconciliation/Payment”
- Click YES
- The Auto Payment options will be displayed. Use this option to auto create a payment for
- Statement Balance - will show the Statement Balance entered above
- Total Balance – the most current balance due in CC check book (Not for the Statement date)
- Other Amount – this will open a box to enter the amount to pay
- No Voucher Creation – if you will pay by entering manual payments in AP.
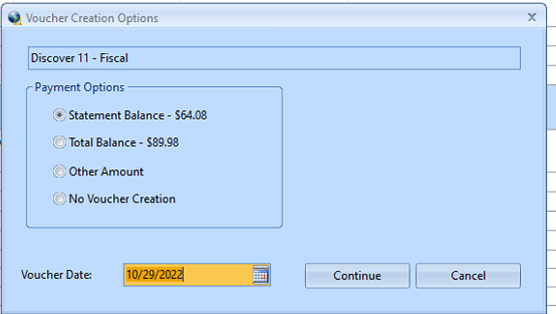
- Enter the Voucher date to use in AP (default to today).
- Click Continue to process the payment option chosen.
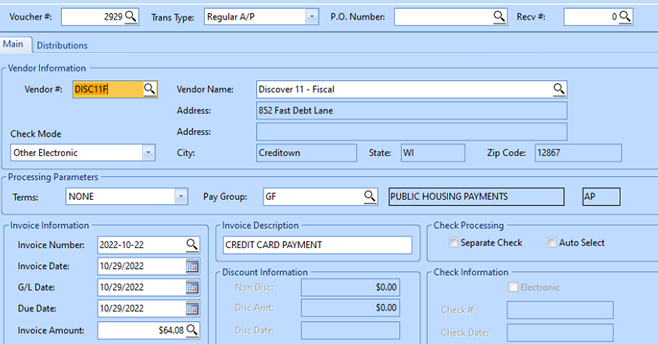
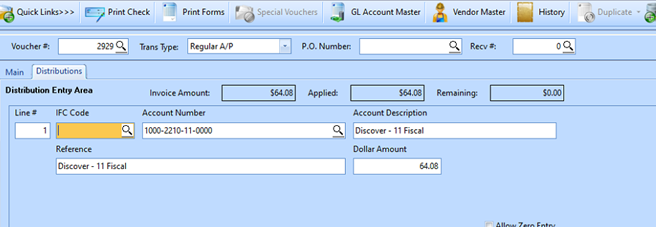
- An AP voucher will be auto-created for the vendor.
- It will use the Vendor’s Default Pay group for the amount selected at the end of the reconciliation process.
- The Distribution line will use the CC liability account entered in the Checkbook.
4/2023